Items filtered by date: February 2026
K2 Scroller
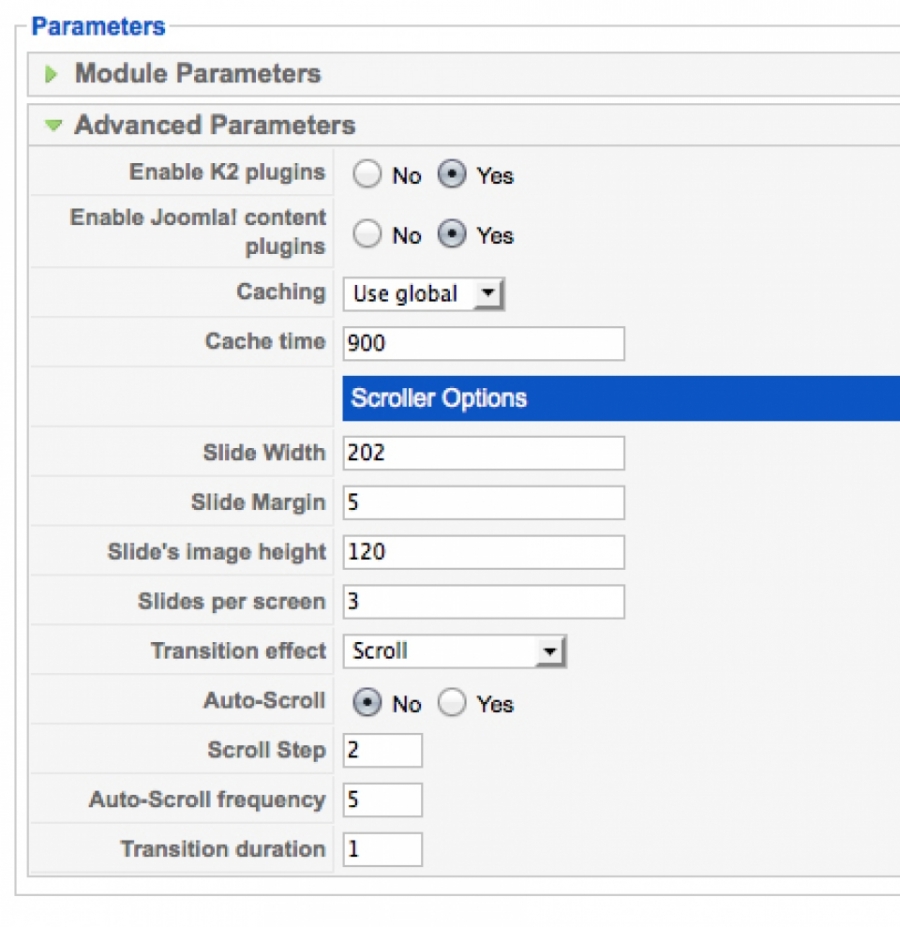
Use the K2 Scroller to display your K2 items in a fully customizable scrolling gallery. Built after K2's original K2 Content module, it takes advantage of all of K2's posibilities.
Check the demo of the module and download the installation file for free, today.
Custom Admin Templates and Calling Specific Extra Field Data
I love K2, and I've played with a lot of other CCK solutions, some are great but often its more than you need when K2 is almost perfect and you dont want to start from scratch building a whole app through another CCK.
In this case, I needed to customize (read: simplify) the backend of K2 for a client and I realized it would be so great if I could control the backend template per category just like I can for the frontend. So I put together this hack. Its not perfect, but it works.
This way, I can have some categories whose admin pages show their extra fields in the first tab, or perhaps just the text editor and video settings, depending on what I need for that content, without confusing the client with lots of options they dont need.
In theory, this setup combined with extra fields and the ability to call specific extra field data in frontside K2 templates basically makes K2 as versatile as any CCK, without the need to build it all up from scratch. For most projects, K2 is a perfect base, and with these two additions I can customize it more than I ever might need. Of course, either of these might be useful to you on its own as well.
Part A: Adding Custom Admin Templates
I previously had a more roundabout way of doing this posted here, but this way is much easier!
Step 1: In the file administrator/components/com_k2/views/item/view.html.php paste the following code just after
$this->assignRef('form', $form); (around line 307)
jimport('joomla.filesystem.folder');
$componentPath = JPATH_SITE.DS.'components'.DS.'com_k2'.DS.'templates';
$componentFolders = JFolder::folders($componentPath);
$db =& JFactory::getDBO();
$query = "SELECT template FROM #__templates_menu WHERE client_id = 0 AND menuid = 0";
$db->setQuery($query);
$defaultemplate = $db->loadResult();
if (JFolder::exists(JPATH_SITE.DS.'templates'.DS.$defaultemplate.DS.'html'.DS.'com_k2'.DS.'templates'.DS.'admin'.DS.$item->catid))
{
$this->_addPath('template',
JPATH_SITE.DS.'templates'.DS.$defaultemplate.DS.'html'.DS.'com_k2'.DS.'templates'.DS.'admin'.DS.$item->catid);
}
Step 2: To initiate the override, duplicate the folder and contents of /administrator/components/com_k2/views/item/tmpl, move it to templates/MY_TEMPLATE/html/com_k2/admin and rename the new folder with the category id you want to override. Then edit the enclosed file default.php (the template for the k2 item backend screen) as much as you want to change the admin appearance for that category.
Click the link below for an example of admin view for editing a specific category with the admin item view override. Notice the extrafield tab is now first, I removed the unnecessary tabs, and renamed the remaining ones.
http://jurawa.com/notes/item/27-update-making-k2-more-like-a-true-cck-custom-admin-templates-and-calling-specific-extra-field-data
Part B: Calling Specific Extra Field Data on the Frontend
Note: Ive actually only used this in the item view, but Id imagine it would work fine in the category_item view as well. UPDATE: it works fine there too.
Note 2: I had a different method posted here before but I found out a better way to do it. The old way put the extra field data in an array based on the ordering of the fields but that meant that if you wanted to reorder the fields - something that I couldnt figure out at first but is possible, just for some reason you have to click order at the top of the column before it lets you - anyway, this would change the array and therefore break the template you made based on the specific extra fields. This way, the extrafield values are based on their ids, so you can reorder all you want and they will still work fine.
Step 1: Make a new K2 template - copy the folder and contents from components/com_k2/templates/default to templates/[your joomla template]/html/com_k2/templates and rename it.
Step 2: In the item.php file in your new template insert the following code just after K2 Plugins: K2BeforeDisplayContent is called. Note: Basically this just puts all the extra field data for this item in an array so you can access it. I dont know if it matters where you place this, but it has be be sometime before you try to use your extra fields in the template.
<!-- Call to prepare extra fields --><?php
//convertArray to use ids as key
$extrafields = array();
foreach($this->item->extra_fields as $item)
{
$extrafields[$item->id] = $item->value;
}
?>
Step 3: Now you can use the following bit of code anywhere to call any extra field value by its id.
<?php echo $extrafields[13];?>The array value in the brackets after the variable will correspond to the id of the extra field. you can see these in the backend extra fields view.
Just to get you started, an example of how I used this was to make a custom social media link section on a site thats easily updated by the client - just by putting in the links they want for each item in the extra fields of that category, rather than having to try and use the editor. It also checks if there is any value in each before displaying the icon:
<div class="artistSocialMedia"> <!-- Twitter --> <a href="/"target="_blank"><img src="/images/smicons/twitter2.png" alt="Twitter" title="Twitter" /></a> <!-- Facebook --> <a href="/"
target="_blank"><img src="/images/smicons/fb2.png" alt="Facebook" title="Facebook" /></a> <!-- Vimeo --> <a href="/"
target="_blank"><img src="/images/smicons/vimeo2.png" alt="Vimeo" title="Vimeo" /></a> <!-- Youtube --> <a href="/"
target="_blank"><img src="/images/smicons/youtube2.png" alt="Youtube" title="Youtube" /></a> <!-- Flickr --> <a href="/"
target="_blank"><img src="/images/smicons/flickr2.png" alt="Flickr" title="Flickr" /></a> <!-- Instagram --> <a href="/"
target="_blank"><img src="/images/smicons/instagram2.png" alt="Instagram" title="Instagram" /></a> <?php endif; ?> </div>
The next step will be to figure out how to make all this into a plugin, but im far from that at the moment...
Also, I havent tried it yet, but combined with the fields for k2 extension this could be pretty sweet.
Thats it for now, hope it helps some of you... let me know in the comments what you think.
Also, check out other web/joomla/k2 related posts on my blog: http://jurawa.com/notes
DM Articles Dropdown for K2
With DM Articles Dropdown you can decide to show the articles' date and format it exactly as you need, setting its font style, its position, its format and so on. In addition, you can choose to display a bottom link, allowing you to provide a customized "read more link" to your module.
DM GoogleNews Sitemap for K2
K2 TwitterTweet
This way all your Twitter followers instantly knows when your site have updated contents.The plugin will automatically tweet your article title along with a tinyurl to your article. It will also create #hashtags based on the K2 tags in our article. As simple as that.
Works out of the box without any thirdparty or API registrations.
Features
- Joomla 1.5, 1.6 and 1.7 native
- Tested on K2 2.5+
- Automatically tweet out new articles.
- Support for TinyURL.
- Support for Twitter Hashtags
- Specify which article categories to tweet
- Works in both frontend and backend
- Languages included:
- English
- Swedish
- Joomla 1.5 or later
- K2 2.5 or higher
- Twitter account
- PHP 5
DM Maps for K2
Features:
- Multi marker view: display all your items' locations in one view;
- Route directions support: the user can input his starting location and read the route inside the map;
- Route directions popup: directions can be displayed in a jQuery popup;
- Street View support: the user can activate Street View for the location shown in the map; Street View is displayed in a jQuery popup;
- Popup theming: support for several jQuery UI themes, and animation effects;
- Customized bubble content: you can customize the bubble content for every item (HTML enabled);
- Multi extrafields: you can display the map also using multiple extrafields for state, province, address etc.;
K2 BlogPing
This plugin adds blog pingback functionality to Joomla, just like the ones you find in Wordpress.
A Ping is a message is used to let other people know that you have published new content on your site. The ping message is sent to different Update Servers of your choice, which in turn processes your ping to make your new post show up in different blog listings like Technorati and Google Blogs for example.
So why would you want to ping? One word: Traffic!
The more you let everyone know you have new posts, the more traffic to your site you'll expect. A ping also notifies different search engines that your site has updated.
The BlogPing Plugin is configured with Ping-o-matic by default, but you can add as many Update Services as you wish. The best thing about Ping-o-matic is that it automatically forwards your ping to 11 other Update Services and search engines.
HOW DOES IT WORK?
The plugin is triggered everytime your page gets visited, to see if theres any new posts made since the last ping. If it finds new content, a ping is sent to the Update Services you've specified. You can just sit back and relax while the plugin automatically promotes your website.
INSTALLATION
BlogPing is installed like any other extension. It consists of one simple plugin that makes the job for you. One installation file for all Joomla versions (J1.5-J1.7) makes it dead simple to install.
CONFIGURATION
The BlogPing is configured to work out of the box, after you've enabled the plugin. You could still tweak the settings of your choice:
* Specify which categories to ping. Some or all?
* Enter a list of Update Services to use.
* Settings to ping on new posts or new and updated posts
* Enable or disable display of messages in backend.
REQUIREMENTS
* Works on Joomla 1.5+
* PHP 5 required
LANGUAGES INCLUDED
* English
* Swedish
If you don't know what ping is, then you really missed something. This is something that almost every blogging plattform uses. A ping i basically a shout out to an update server, that your site has fresh content. The updateserver will then list your article automatically to it's blogpost listings.
Hopefully your ping will get You tons of new visitors, that you otherwise never would have reached.
K2 presentation at JoomlaDay Netherlands (2010)
K2 Admin Item View - Tags Used Query
Well, in this guide, we are going to show you have you can easily add this functionality without have to modify any core K2 files, but could also be added as acore fix.
Try this out, post you comments and maybe we could see this as a standard K2 feature.
The New Edit Item Layout
 Wouldn't it be great if you could look at your K2 Item List in the Admin area and instantly see which Items had Tags on them and which did not so that you could then go and add those missing tags.
How about being able to see all the tags that are used in you K2 Item, also lists out as well, if that sounds untersting to you, then read on.
In the screen shot, can see those exact changes.
- A Tags Used column is displayed, with Green ticks if there are tags, and a Red cross if there are none.
- Under the Item Title, you can see that Tags have are displayed as weel. Each tag is linked to the Tag Editor.
Setup Procedure We have made this even easier for you now as our download includes the folders that the previous guide asked you to create, follow the revised guide below.
- Download the zip file. (from k2joom.com, requires registration)
- Upload/Extract to administrator/templates/YOURTEMPLATE/html/
- Login to your sites Joomla admin, navigate to the K2 Items List and you will see this new tag information.
If you plan to change your Joomla Administrator template, then you need to copy the default.php file to the new Joomla Template folder
Hope find this useful, comments greatly received.Many thanks to:
Claire Mandville for the Idea.
Olivier Nolbert from www.jiliko.net for the coding
Allowing users to submit content
Process
- Create a K2 category such as "User Blog"
- Create a K2 User Group such as RegUsers (or whatever you want to call it)
- Set permissions as follows:
Post comments: Yes
Front-end item editing: Yes
Add items: Yes
Edit own items: Yes
Edit any item: I would suggest no
Publish items: Your choice, but consider that you may want to check content before publishing - Under Assign group permissions to these categories select the User Blog category only.
If your going to create sub categories in User Blog, then enable Automatically assign group permissions to the children of selected categories.
Only within the selected categories will the registered users have the extra permissions set in that user group.
Test It Create a "test" user from within the admin panel and move them to that user group.
TIP: By using a test user, you then can run these types of tests, or create system content and it will then NOT affect your main admin user account.
Consider this, you create test content or system content using your admin account and those items will appear in your latest items and blog which you may not want to have displayed.
Login to the front end of your site, and click the "add item" from the K2 login module.
In the modal window, check the categories drop down and you will see that you can only select those that were set in the User group.
Already got registered members? If you already have a lot of registered k2 users, then you can move them.
Go to the K2 User screen.
Filter the list to display just Registered, using the drop downs at the top right of the screen.
Click the select all check box, top of all the check boxes on the left side.
Click on the Move icon.
In the next window, select which category you wish to move them to and then click Save.
Thats it job complete
Categories
Recently Updated
- 01 Dec 2021 RAXO All-mode K2
- 01 Dec 2021 RAXO Related K2 Items
- 02 Nov 2021 RAXO Insert Position
- 12 Oct 2021 4SEO all-in-one SEO extension
- 26 Mar 2021 Econa


