K2 Categories
by: Ryuhei Yokokawa
Accessing K2 Categories
1) Login to administrative back-end for your website.
- Open your browser and go to: www.yoursite.com/administrator.
- Type in your username and password and log in.
2) Select K2 Categories
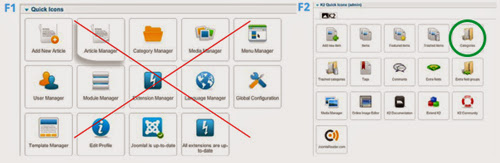
- If your Administration page is showing a “Quick Icons” listing as in figure 1 below, do not use this. Instead, click on the “K2 Quick Icons” drop down menu, located below the “Quick Icons” listing (figure 2).
- Click on the “Categories” button in the “K2 Quick Icons” listing (shown below in green).
Change/Create a New K2 Category
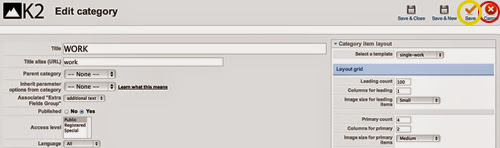
Create New K2 Category - Click on the “New” button, located towards the upper right corner and marked by an orange and white “plus” sign. (displayed below in red).
Edit Existing K2 Category - Select the category you would like to edit from the category listing (displayed below in yellow).

Important Note About Saving Changes!
- Whenever you make changes in K2, remember to click on the “Save” button, marked by an orange check (displayed below in yellow).
- After saving your changes, in order to leave the Edit Category page, click on the “Cancel” button, marked by a red and white “x” (displayed below in red).
- You can expedite the process by clicking the “Save & Close” or “Save & New” buttons depending on if you want to save and return to the menu or save and create a new category.
Titles and Descriptions in K2 Categories
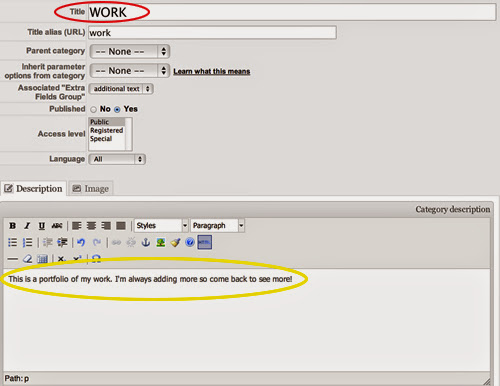
- You can modify the title and/or description via the title text field (displayed below in red) and the description text field (displayed below in yellow).
- Titles and descriptions may or may not be used depending on how your site is configured.
Uploading Images
For a more detailed description of how to upload and edit images, please see our tutorial on "IMAGES & QUALITY".
- You can upload an image via the image field located next to the content/description tab (displayed below in red).
- Just simply select “Choose File” (displayed below in yellow) and locate the file on your computer.
- If you would like to delete your image, check the box located at the bottom (displayed below in blue), and click the orange save button.
