Blogging with K2
21 July 2014A quick background to Joomla
Most modern websites use a Content Management System (CMS) such as Wordpress or Joomla. The main advantage of a CMS is that it gives the website owner the freedom to blog and create their own content without the help (and costs) of a web design agency.
Whilst a CMS gives some of the power back to the website owner by allowing them to produce and manage their own website content, there are a few very important rules to respect when creating your own articles and modifying existing website content, which we will discuss in this post.
At Jeyjoo our CMS of choice is Joomla as we believe it is the most flexible and powerful content management system.
What is K2?
K2 is a content platform for Joomla. It's also ideal for blogging. As many of our clients use K2 for blogging, and there is no guide out there written specifically for bloggers and website owners, I thought it best to write one.
A Bloggers Guide to Content Creation in Joomla k2
Once you are up and running with your own Joomla website, and feel ready to start blogging (or creating content as it is now fashionably called), follow these rules to get the most out of your website, boost your website visits from search engines, and avoid making the common K2 mistakes.
Getting started with K2
- Log on to your Joomla Admin Panel. You can usually access this by inserting the url www.mysite.com/administrator/ into your web browser (make sure you substitute your actual domain in for mysite.com)
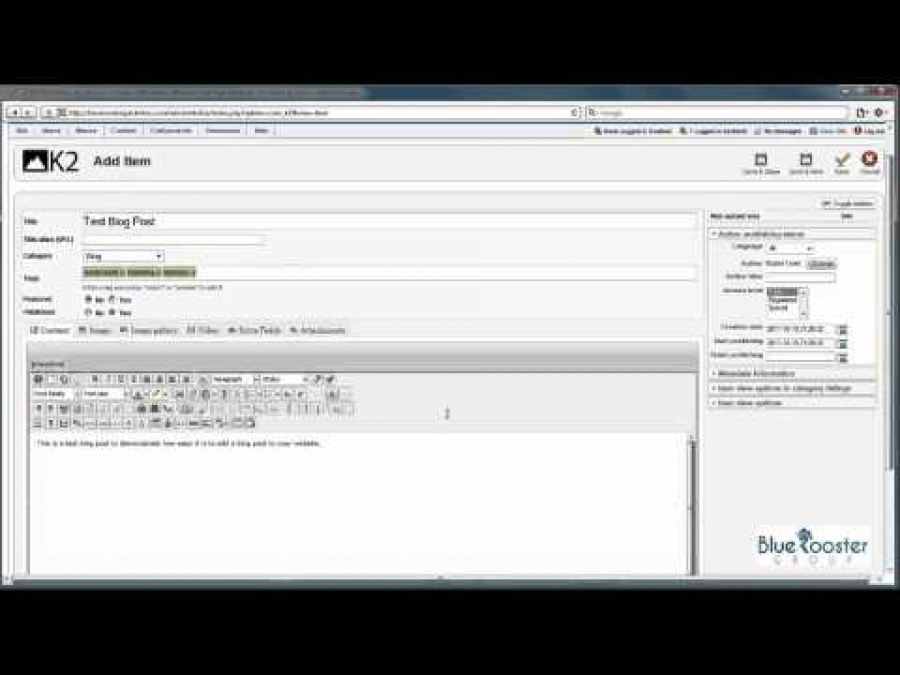
- From the main menu select "components" / "K2" / "items" ("items" is just the confusing K2 term for what is otherwise known as a blog, article or webpage). Note - please leave all other options in the K2 menu untouched unless you have web development knowledge or have been told otherwise by your web agency.
- You will now see a screen with a list of all of blog items on your website. From this screen you can add new items; edit any existing items, publish/ un-publish items, and even delete items should you need to.
- For the purpose of this tutorial, we will create a new item (blog) - so click on the "New" button.
- Now you can write your K2 item and make any edits using the detailed instructions below.
- Once finished make sure you click "Save and close". Otherwise the item will remain locked and other website administrators will be unable to access it.
The compulsory fields in a K2 blog

1. Title
Add a Title that clearly describes what your blog item is about. If you want to optimize your new blog for search, then your chosen keyword/ key phrase should be included in the Title.
2. Title Alias (URL)
When you first save your item, the Title alias (URL) will auto-complete based on the Title you created, so you don't actually need to touch this field. Here are a few simple and very important rules to follow when creating a Title alias (URL):
- The Title alias (URL) will be the link to your new blog page. Once your blog goes live, the Title alias (URL) should NEVER be changed, otherwise you will lose your social shares, backlinks from other websites to your article plus any potency that the page has achieved in search engines rankings such as Google.
- The page URL (or link) should be descriptive, pertinent to the k2 article and human readable (ie. without funny characters and symbols). If you have any doubts at all, just make sure that the URL is identical to your item Title.
3. Category
When creating your website, your webmaster will have set up a selection of K2 Categories. The Category is an extremely powerful field that dictates in which section of your website the blog item will show up. Changing the Category field will move the item to a different section of the website.
In general once a blog is live you will never want to change the Category as it could upset your page links. If your item has been published for more than a few days, always check with your web agency before changing the Category field.
4. Published
Publish is a straight-forward yes/no field that will publish or un-publish your K2 blog item. If you want to remove an item from your website simply set this field to No. You can revert back to "published" whenever you want.
5. Content
The content tab is where you write the text for your new page.
We are now in the world of Web 3.0 and the Semantic web. Realistically if you want your K2 blog item to rank well on Google, then we advise a minimum of 1000 words, and ideally around 2000 word of high quality, informative copy. Simply put, if there are better pages out there on the web covering the same subject, then you will struggle rank well and get new visitors from Google (which is usually the main writing a blog).
A word of warning about using the Text Editor:
- Keep use of the Text Editor buttons to an absolute minimum.
- Applying bold, underline, italics and headers to the article is time consuming and your site will not be uniform.
- Any good web designer will have built your website using a central graphic override file called a .css or .less file. From here they will be able to control the look of your entire website in a few seconds - rather than you going through every single page to make a graphic change.
- Controlling the graphics from the central graphic override file will ensure that your website has a consistent professional look throughout.
- Although you cannot see it, text editors often adding lots of unnecessary code to your page, making your website slower to load, and harder for Google to rank.
6. The Image tab
Although technically not compulsory, adding an image to each blog item is a wise idea. The truth is that although we shouldn't judge a book by its cover, we all do! Choosing a striking image that reflects your blog will work wonders for your article especially on social networks. Looking for free images? Try these free stock image websites.
7. Meta Description
Open the Meta information tab and click on the Description field. The Description is what will show up in Google search listings.
Use your Description to elaborate on your page title and give your potential audience a better idea of what will be on the page when they click. A typical search results page has 10 website listings, so a well written Description will ensure your website stands out and will improve your click-through-rate. Try and describe exactly what your page is about using superlative terms and even the odd UPPERCASE word to give your page a competitive advantage.
Google shows 150 - 160 characters (including spaces) of a page's description (aka meta description tag). If your Description exceeds 160 characters it will be truncated.
8. The Image Button
Use the image button (found directly below the Text Editor) to add images into your K2 blog item. First of all, click within the item text exactly where you want the image to appear, hit the "Image button", and a pop-up window will appear.
- You have the option to either select the image directly from your server or upload from your computer.
- Align image to left or right
- In the Image Description field add a short sentence that describes what is in the image. As Google cannot see your image, it will use this description to enhance it's understanding of your page - this can help improve your search ranking.
How to edit a K2 item in Joomla
Editing a K2 item is similar to creating a new item as outlined above:
- Log on to your Joomla Admin Panel
- From the main navigation menu select "components" / "K2" / "items"
- Instead of hitting the new button, click on the item you want to edit.
- Make changes to your K2 item, following the guidelines above.
- Once your item (blog) is live, never change the Title alias (url) field or Category unless otherwise instructed by your web agency.
Tl;nr
- The Title field should explain clearly what your K2 item is about
- A catchy, well written Title and Meta description are hugely important factor in boosting your website visits. Better titles and descriptions will improve your we website click-through rate from search engine rankings
- Once you blog item is live, NEVER change the Title Alias (url) or the Category fields
- If in doubt, the Title Alias (url) should be the same as your Title
- Keep use of the text editor to an absolute minimum, leaving all graphic aspects to your web designer
Final thoughts
I hope our Bloggers Guide to K2 has been beneficial and that you will go on to use it. If you found it useful, please share with other Joomla website owners using the social buttons provided. We love to hear your comments, so if you have any questions or feedback, please let us hear it.
More
